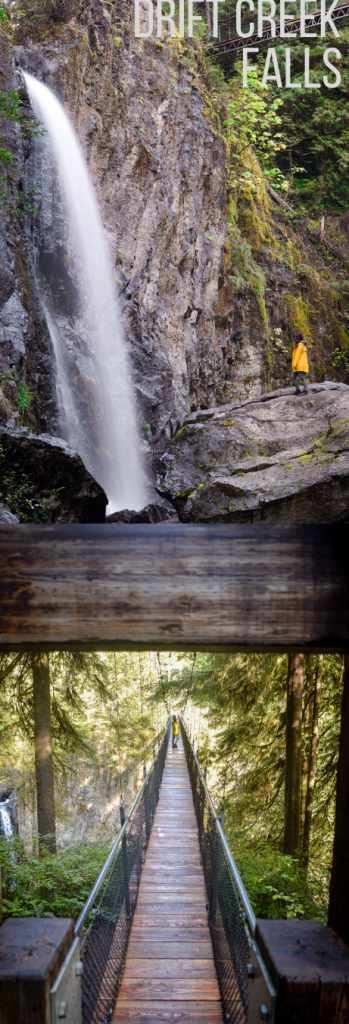


The Oregon Coast is packed with gorgeous trails, but Drift Creek Falls definitely takes the cake.
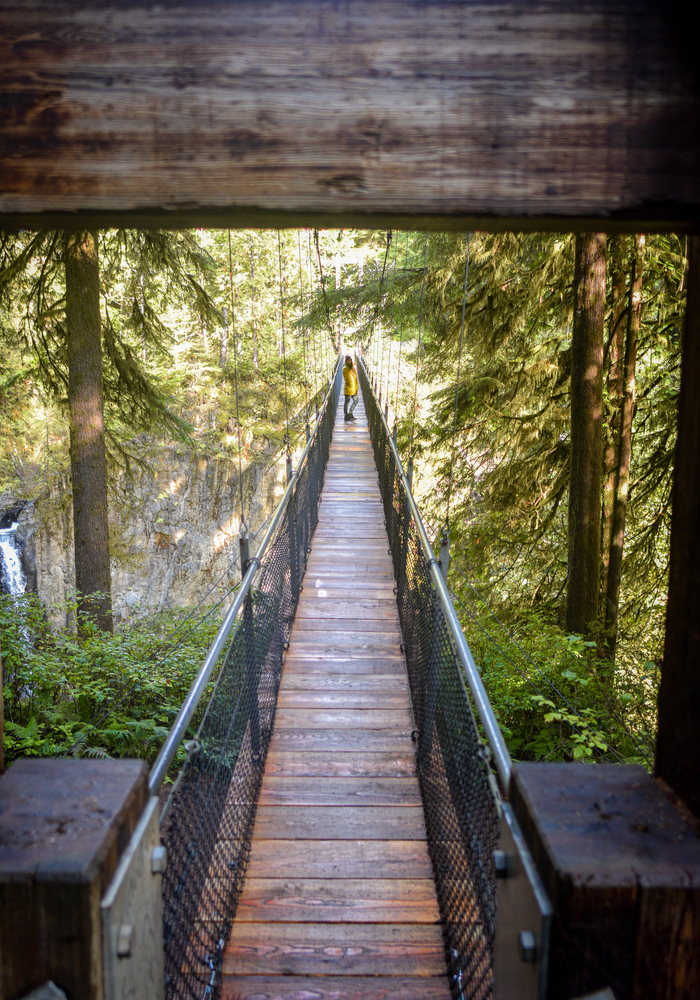
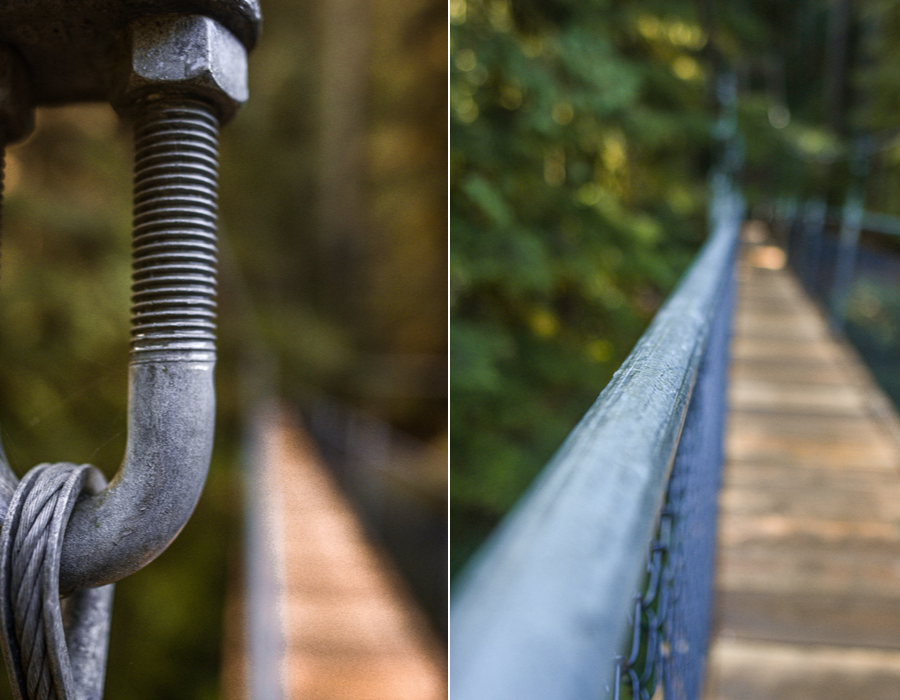
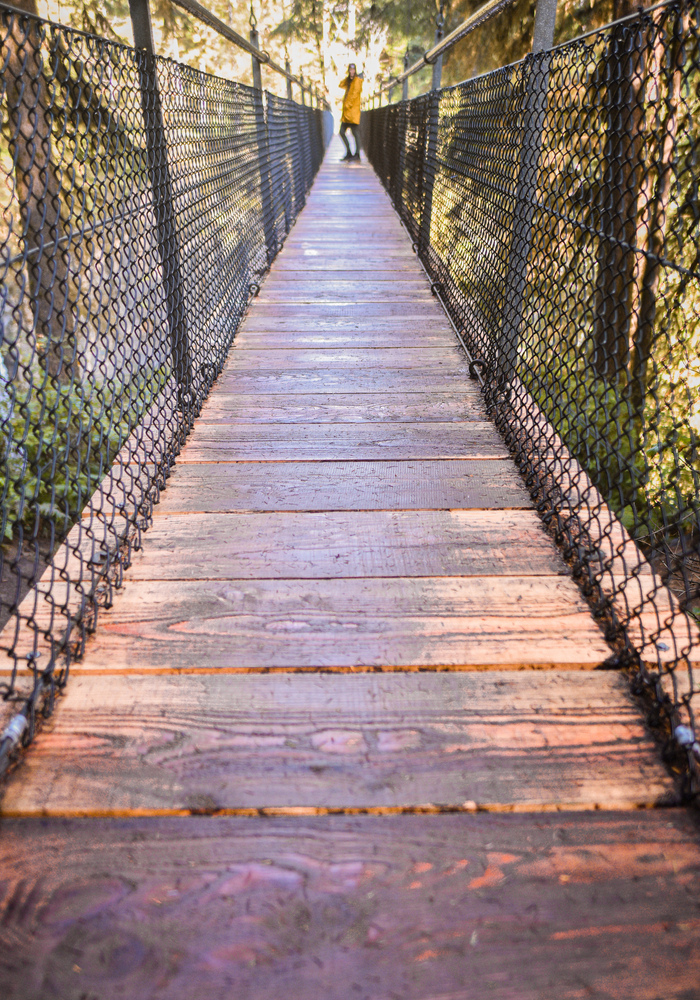
Complete with lush forests, a giant suspension bridge, and an 80-foot waterfall, this is one of those rare experiences where you’ll find the destination to be even better than you expected. And in a world full of over-edited and photo-shopped pictures, that’s saying something. Big time.
But before you belt up your cargo shorts and strap on your trusty, tourist Birks, there’s a few things you should know about this short but epic trail.
In this blog, I’m going to go over the following:
1. What to Pack
2. Things to Know Before You Go
3. Best (and least busy) times to visit
4. Fees (and ways to get around the fees)
5. Detailed trail info
6. How to Get to the base of Drift Creek Falls
7. Photography Tips
RELATED: Best, Easy Stops on the Oregon Coast Highway
Looking for more hikes along the Oregon Coast? Find the 10 best, here!
1. WHAT TO PACK
The Drift Creek Falls trail isn’t super hardcore or anything, but there’s a few essentials you should definitely take with you to make the hike more comfortable (and more fun).
- Cash. It’s $5 to park at the trailhead (with some exceptions – listed below)
- Water. The trail is short, but the way back from the bridge is entirely uphill. You’ll likely survive without water, but you’ll wish you had brought some.
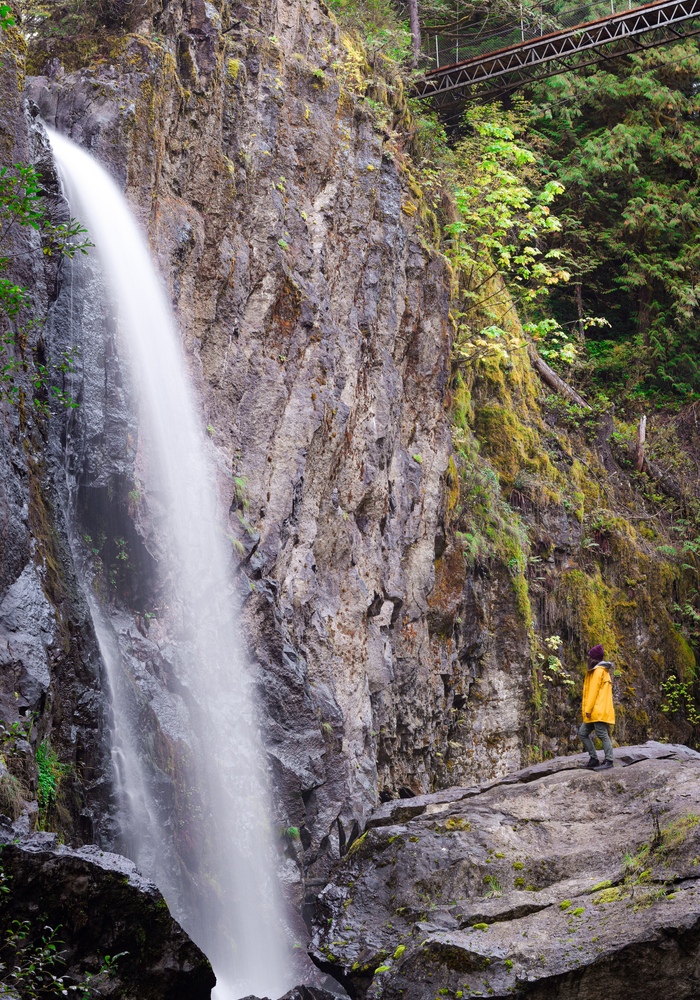
- A camera. I recommend a DSLR if you have the option, but if you don’t any camera will do! The only reason a recommend a DSLR is that you’ll be able to capture that “flowing” effect at the base of Drift Creek falls (you’d also need a tripod and an ND filter so your image doesn’t get blurry or over-exposed). You can see in the photo above that at a “normal” (faster) shutter speed, the waterfall is frozen in time and you don’t capture the movement of the waterfall. In the very first photo of this blog post, I used a slow shutter speed and was able to get that smoothed-over look.
- A water-proof, or water-resistant jacket. This trail is notoriously wet – and to get close to the falls, you’re going to have to get at least a little dirty. You want something that will wipe clean easily.
- Good, leak-proof boots. You’ll want boots that will keep your feet nice and dry (and mud-free). The trail can get pretty messy. Breathable boots are great for most trails, but on this particular trail you’ll want something to keep the mud and water out.
- Water-resistant hiking pants (if you have them). These aren’t a must, but again – if you’re planning on getting up close and personal with the waterfall, you’ll definitely get some mud on your clothes. It’s nice (especially when traveling) to have hiking clothes that you can wipe clean with a damp cloth. I wore my green climbing pants from Vuori – but some other good options are Eddie Bauers Guide Pro Pant and Backcountry’s On the Go Pant.
2. KNOW BEFORE YOU GO
- The drive up to the trailhead is slooooow. You’ll be traveling uphill on winding roads for quite some time.
- You may not get cell service up in the hills, so either memorize your way back (if you’re good with that sort of thing) or get the maps.me app and download the appropriate map before heading out.
- You may have a hard time finding a place to park if you arrive too late in the day.
- There is a $5 fee to park at the trailhead (with some exceptions – listed below).
- There ARE bathrooms at the trailhead.
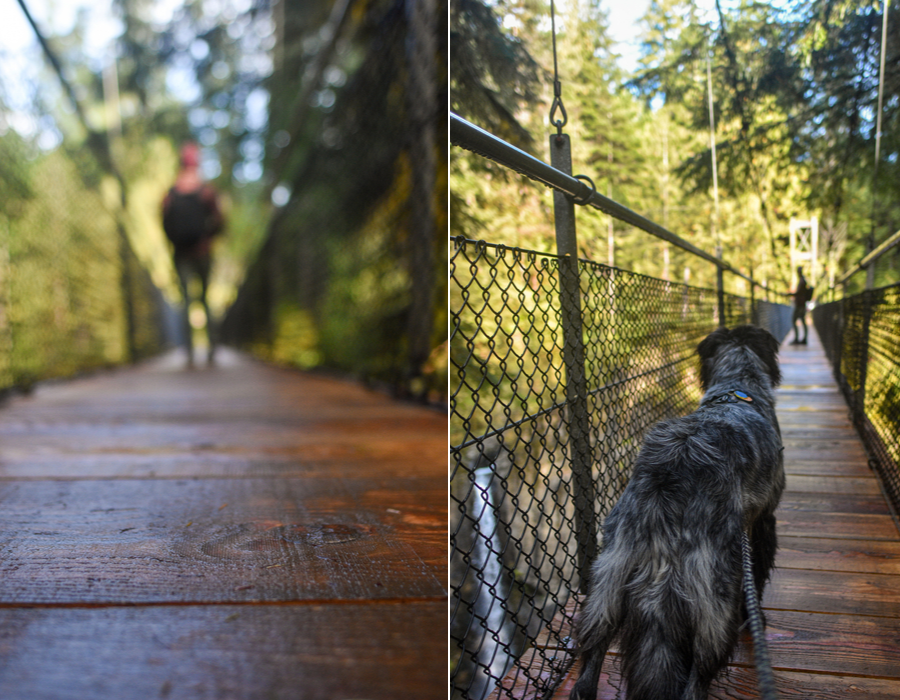
- Dogs are allowed on the trail, but must be kept on leash (and please bring poop bags).
- The trail is often muddy, so don’t expect to keep your boots clean.
- You’re at a much higher elevation, so you may need to dress warm. Check the weather before you head out!
3. BEST (AND LEAST BUSY) TIMES TO VISIT
No matter where I travel (aside from big-name National Parks) it seems like one thing is always consistent: the tourists arrive at 10am. Not that I’m NOT a tourist. I hate that whole movement of: be a traveler, not a tourist. I get the thought behind it, but the actual definition of tourist is just “a person who visits a place for pleasure”, so whether we like it or not WE’RE TOURISTS Y’ALL. But I digress.
What I’m trying to get across is: the leisurely tourists (the majority of tourists, and the people whose calm, laid back attitude I envy) usually arrive at about 10am.
They’ve woken up, they’ve had their shower and their hotel breakfast and now they’ve arrived.
Obviously, the earlier you arrive, the less people you’ll see on the trail. But since the trail is situated in such dense forest, if you arrive too early you won’t see much light coming through. Usually, I like to arrive at my destination at first light but in this case we arrived at about 8:30am and got to the suspension bridge at around 9:00am. This worked out perfectly. There was enough light in the canyon, but not so much that everything looked washed out, and we had a full hour to photograph and enjoy the waterfall.
There WERE a few groups of people there with us, but it was easy enough to wait for them to pass before photographing. The maximum time we had to wait for a photo was about 5 minutes.
4. FEES (AND HOW TO GET AROUND THEM)
As stated above, the fee to park is $5 per vehicle.
There are ways to avoid this, however. And I’m not talking about “shady, sort of illegal but who really cares” ways. This is all above board, guys.
$5 is not a lot of money, by any means, and the money goes towards maintaining trails (something I can actually get behind). BUT, if you’re like me, you don’t often carry cash and there is no other option at the Drift Creek Falls trailhead. Some places have credit card forms – they don’t here.
So basically, aside from having $5 cash in your pocket, you have 2 options:
- Go on one of their FREE days like we did. This was totally luck, but we ended up arriving on National Public Lands Day and didn’t have to pay the fee (which was totally awesome because we didn’t know about the fee, and did not bring $5).
- Buy a pass. If you have a printer handy, you can purchase a National Forest Recreation pass online for just $5. This pass covers SEVERAL National Forests in both Oregon and Washington! You can purchase your pass (and learn the details) here.
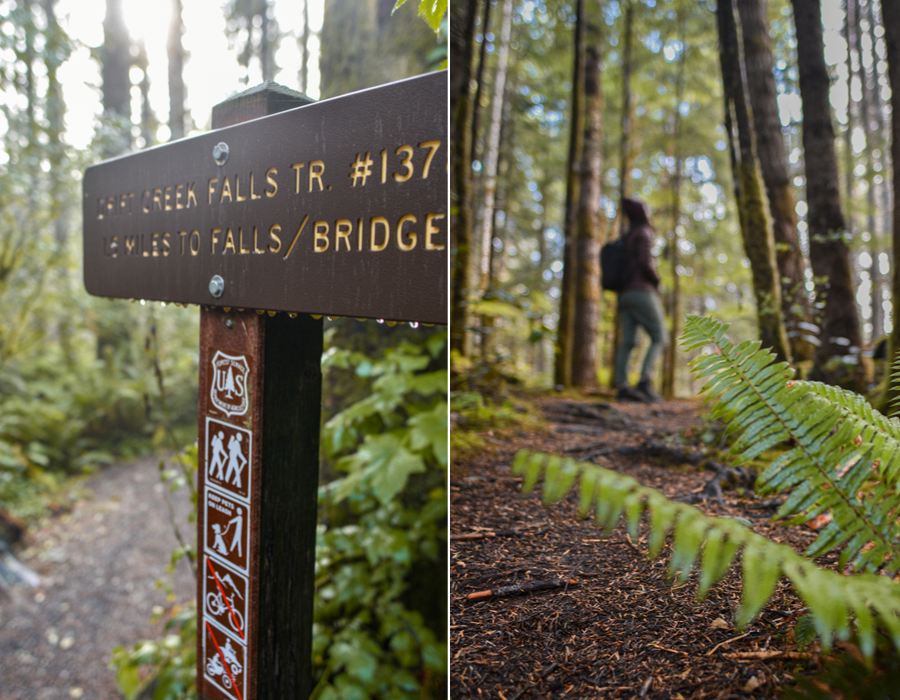
5. DRIFT CREEK FALLS TRAIL INFO
Basic Trail Info:
Distance: 2.6 miles
Elevation: 462 feet
Trail Type: Out & Back
Difficulty: Easy
Detailed Trail Info:
The Drift Creek Falls trail is pretty straightforward (and well-marked) up until you reach a fork in the trail. You’ll have the option to go straight (which is a whole other trail) or turn right. Once you turn right, you’ll immediately reach another decision point. Straight ahead, the trail seems to go across a creek. For some reason, it seems people often try to go this way. Turn right instead. It’ll take you across the river via a bridge.
The trail is almost entirely downhill all the way to the waterfall, which is nice, until you start making your way back. What goes down, must come up! That’s the phrase, right? Anyway, just keep that in mind on your way to Drift Creek. The elevation isn’t bad, just consistent. Take breaks if you need to!
It’s also important to note (if you didn’t read my Know Before You Go section) that the trail is usually pretty wet and muddy, so dress accordingly!
Once you reach the Suspension Bridge, you can hop off the other side and head over to your right for a different vantage point of the falls. You’ll notice a large log with essentially a muddy slip-and-slide hill on the other side. This is a “path” people frequently take to get to the base of the falls. This is also the wrong path to take to get to the bottom of the falls. In the next section, I’ll talk about how to get there the safer and less dirty way.
6. GETTING TO THE BASE OF THE FALLS
As described above, there is a muddy hill that visitors often scramble down to get to the base of the falls (right next to the suspension bridge). This route is unnecessarily difficult and messy. Instead, continue straight once you hop off the bridge (walking parallel with the canyon, not towards it). You’ll link up with a path, an actual path, that will wind it’s way gradually down to the base of Drift Creek Falls.
The only downside with this route, as opposed to the messy mud-slide route, is that it’s more difficult to get up to the rocks surrounding the waterfall (where I’m standing in the photo above). To get here, you’ll have to hug the side of the hill (opposite the waterfall), scramble over the wet rocks, and duck under a few logs. I know I’m not old or anything – I’m 26 – but I felt old trying to duck and dodge and stretch my legs up over some of those boulders. It definitely requires at least a mild amount of flexibility and I would not recommend trying it unless you have shoes with good grip. I saw a few people wipe out on the wet rocks.
If you do decide to try it out, be very careful and take your time!

7. PHOTOGRAPHY TIPS
I’m no expert photographer, by any means, but here are some simple things I tried that worked out really well!
- Pack a tripod and an ND filter. For long exposure shots of the waterfall.
- Take your time and test out different shutter speeds. Being that I’m not an expert, I try out a bunch of different settings until I find the perfect shot. This is really the best way to learn when you’re new (in my opinion).
- Use manual focus. Once you learn manual focus, there’s no going back. It’s just faster, better and easier to focus on what you want to focus on (especially when you’re focusing on something very close to you, or a moving subject).
- Wear bright colors. When I’m in photos, I like to wear a bright colored jacket so I don’t blend in with my surroundings. Especially if I’m taking photos where I’m just a tiny little person in the distance. Yellow and red contrast nicely!
- Wait for people to clear out. Taking good photos takes some patience. Unless you want to photoshop people out (which is actually super easy these days), your photo will look better without a bunch of randos in it. And if you’re doing a long exposure photo, the people in it are likely to move around, so you’ll end up with a bunch of ghost people walking around in the background. Not a good look.
EXPLORE MORE OF OREGON:
1. BEST HIKES ALONG THE OREGON COAST
2. BEST STOPS ON THE OREGON COAST
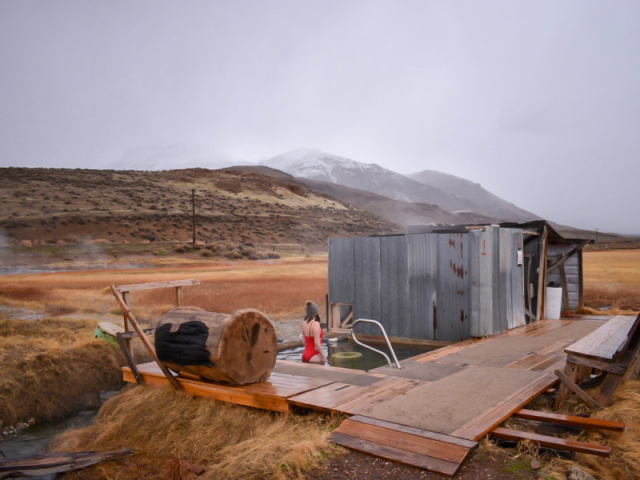
3. ALVORD DESERT HOT SPRINGS
4. 3 AMAZING CAVES NEAR BEND, OREGON
Ever been to Drift Creek Falls? Share your own tips or stories below in the comments!
SHARING IS IN STYLE THIS YEAR. PIN ME!